Beginner DJ Setup: Wire Your Controller, Then Play Your First Mix
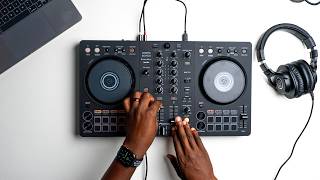
Watch InspirAspir’s tutorial above (3.5M views on YouTube).
This is for new DJs using a controller and laptop. You’re stuck getting a practical “setting DJ” workflow that actually leads to clean transitions.
After reading, you will wire your rig correctly, prepare tracks that cooperate, beatmatch by feel, and move a crowd without trainwrecks. Let’s start with the shortest path to playable results.
Setting DJ Equipment: Controller, Software, Signal Flow
You need one reliable signal path. Follow this order and verify at each step.
- USB from controller to laptop. Launch your DJ software.
- Headphones into controller. Set cue mix to pre‑listen.
- Speakers from controller’s master outputs. Start low on volume.
- Select controller as the audio device in software. Route Master to 1/2 and Headphones to 3/4.
Use the S‑C‑M loop. Source. Control. Monitor. Repeat this loop whenever something breaks.
Source is the deck audio. Control is faders, EQ, and tempo. Monitor is headphones and speakers.
Decks are left and right. Crossfader sends one, the other, or both. Keep it hard left or right while aligning tracks.
Press play on a deck. Confirm meters move and headphones hear it. Then raise master to taste.
If you hear nothing, check audio device routing before touching cables. Software routing is the usual culprit.
Worked example one. Bus‑powered controller into a laptop at a house party.
Run powered speakers from the controller’s RCA or 1/4" outputs. Keep laptop volume at 100%. Control gain from the controller only.
Worked example two. Club booth with a spare line input on the house mixer.
Run controller master into the club mixer on a free line channel. Set your master around noon. Hand gain staging to the booth mixer.
Failure mode. Only one ear in headphones. Symptom. You can’t tell if kicks align.
Fix. Set cue mix fully to Cue. Raise headphones level. Solo the incoming deck.
Validation. You know setup is correct when cueing a deck in headphones does not affect what the room hears.
Library Preparation And Track Selection
Good mixes start earlier than the crossfader. Prepare a small, coherent pool first.
Pick 20-30 tracks within a narrow BPM window and compatible keys. You reduce tempo work during transitions.
Group by function. Openers. Builders. Peak tracks. Resetters. Closers. You’ll move faster under pressure.
Use a lightweight structure. One crate per event, plus small sub‑crates for energy levels.
Some DJs keep this in spreadsheets. Others build hierarchical playlists in their library tool.
Worked example. A 124-126 BPM house pool for a lounge set. Two openers, four builders, two peaks, one resetter, two closers.
Worked example. A “setup de dj” folder for a bilingual event. Duplicate builders with clean radio edits to cover requests.
Validation. You know prep is solid when you can name three next options for any track now playing.
Setting DJ Beatmatching: Tempo And Beat Grids
Beatmatching is two steps. Match tempo. Align beats. Do them in that order.
Load track A on the left. Load track B on the right. Hard‑pan the crossfader to A.
Press play on both decks. You’ll hear A in the room and B in headphones.
First, tempo match with the tempo fader. Move the fader on B until BPMs are equal.
Many apps show a beat grid over the waveform. Grids help, but your ears decide alignment.
If the grid is wrong, fix the grid before mixing. Official docs describe grid editing and locking to prevent drift.
Serato’s support explains beatgrids as markers aligned to beats and shows how to move or slip grids during edits. This confirms why incorrect grids cause tempo issues. See Serato’s beatgrid guide for controls and behavior.
Rekordbox documentation and community guides outline setting the first downbeat, sliding the grid, and locking earlier sections before adjusting later ones. Use that approach for tracks with tempo drift.
Next, align phase. Use the jog wheel. Large nudges on the platter. Fine nudges on the outer rim.
When kicks hit together for several bars without flamming, you’re aligned. Keep listening for drift.
Train your ears, not your eyes. The waveform display tempts you to mix by sight, but matching is heard, not seen. Make small pitch moves, wait several bars to judge the result, then correct again; big swings on the tempo fader overshoot and force constant rescue. Set your cue point on the incoming track at the start of a clean phrase, usually the song start or right after a breakdown, so you always re-enter on a musical boundary. Looping an 8-beat section of each track while you practice builds the timing muscle memory faster than full playthroughs.
Worked example one. 124 BPM to 126 BPM. Set B to 124. Start B at a clean phrase. Nudge until kicks stack. Hold for eight bars.
Worked example two. 150 BPM hardstyle to 152 BPM. Bring B to 150. Align first. Then mix during a filtered break to mask any rub.
Failure mode. The beats line up for two bars, then drift. Symptom. Claps start flamming by bar four.
Fix. Recheck the grid. Lock prior markers. Adjust from the current position through the next phrase. Re‑test against the metronome.
Validation. You know it’s right when you can mute A’s kick for four bars and B’s groove still feels centered and steady.
Build the skill with short daily reps rather than long marathon sessions. Around 30 focused minutes a day on two tracks with clear kick drums and close BPMs builds the ear and the hand faster than occasional hours-long sessions. Start with simple, kick-forward tracks before moving to busier rhythms where the downbeat is harder to find.
Controller‑specific note. Hercules DJControl Inpulse 200 and DJUCED include training aids for tempo and alignment. Refer to the vendor’s manual for exact indicators and behavior.
Execute Clean Transitions With EQ, Filters, And Gain
Crossfader movement is the last step. Prep with EQ and gain first.
Set incoming track gain so peaks match the deck that’s live. Aim for equal loudness before you blend.
Use the low EQ. Cut lows on the incoming deck during the overlap. Swap lows at the chorus or drop.
Filters are seasoning. A light high‑pass on the outgoing deck clears room for a new bassline.
Blend length depends on arrangement. Use eight or sixteen bar phrases to keep structure musical.
Worked example one. Long house blend. Start with incoming lows cut. Mix for sixteen bars. Swap lows on the new downbeat. Recover outgoing highs and mids slowly.
Worked example two. Quick techno cut. Align phrasing. Brief filter sweep on outgoing deck. Mid‑crossfader move over two bars. No bass overlap.
Failure mode. Muddy low‑end and volume spikes. Symptom. Room feels louder but less clear.
Fix. Keep one bassline at a time. Watch channel meters. If reds flash, back off gain and rebuild headroom.
Validation. Your mix remains punchy at the drop. The crowd hears a clean handoff, not two kicks fighting.
Set Planning And Export To DJ Software
Plan one or two anchor sequences per gig. Leave room for detours.
Mark cues on intros and breaks. Name them clearly. You will find transitions faster under pressure.
Export your prepared structure into the tool you perform with. Keep folder and playlist names stable.
If you plan sets visually, a preparation step that orders tracks by BPM, key, and assigned categories speeds routing on the night. Keep the same folder and playlist hierarchy from prep through export so your show deck mirrors your practice layout. Vibes is one way to do that planning, sorting your pool by energy and function and exporting the same layout you rehearsed with into your DJ software.
Validation. When you land at the venue, your USB or laptop view matches your practice layout one‑to‑one.
Beginner Equipment Specs That Matter
Choose gear that matches your environment, not hype. Focus on the tradeoffs that impact reliability.
- Standalone vs laptop‑dependent controllers. Standalone simplifies wiring. Laptop gives software flexibility.
- Screen size for dim venues. Larger, brighter displays reduce mis‑clicks in dark booths.
- Portability vs features. A compact “walking dj setup” travels easier. Larger surfaces give better spacing for performance controls.
- Audio routing. An “interface dj” path with separate master and headphones is non‑negotiable for real mixing.
For underground gigs, favor stable audio drivers, tactile pads, and a readable waveform over extras you won’t touch in the dark.
“Hard dj setup” usually means a fixed rig with sturdy stands, isolated power, and cable management. Build one for practice if space allows.
Usability beats specs. If controls sit too close together, you will make mistakes when adrenaline hits.
Ergonomics decide more than the spec sheet. Back in 2018 my whole setup was a borrowed controller perched on top of an old fridge, and it was still enough to build real skill, because a humble first rig you actually play beats an expensive one you are waiting to deserve. Pick the gear that feels natural under your hands, not the one with the longest feature list. Set your rig at a height where jogs, faders, and EQ fall under your hands without reaching, and you will mix cleaner once the pressure is on.
Common Mistakes To Avoid
| Mistake | Why It Happens | How to Avoid |
|---|---|---|
| Matching phase before tempo | You align kicks that are drifting in speed | Tempo‑match first. Then align downbeats and bars |
| Two basslines at once | Low frequencies stack and smear | Keep one bass at a time. Swap at the phrase |
| Ignoring beat grid errors | Analyzer guessed wrong on downbeats | Edit and lock grids during prep. Validate with metronome |
| Crossfader guesswork | You move without a plan | Pre‑decide blend length. Move at phrase boundaries |
| Gain riding into clipping | You chase loudness during overlaps | Set equal loudness before blending. Watch meters |
Observable errors, root causes, and the fix.
Quick Practice Routine
Conclusion
The core loop is simple. Prepare a narrow pool. Fix grids. Match tempo. Align beats. Then shape the overlap.
Keep your structure tight and your monitoring honest. You will play cleaner and adapt faster when the room changes.
The visual way to organize your DJ library
Tag tracks by vibe. See everything at once. Export to any DJ software.
14-day free trial. Full access, no strings attached.
or see how it works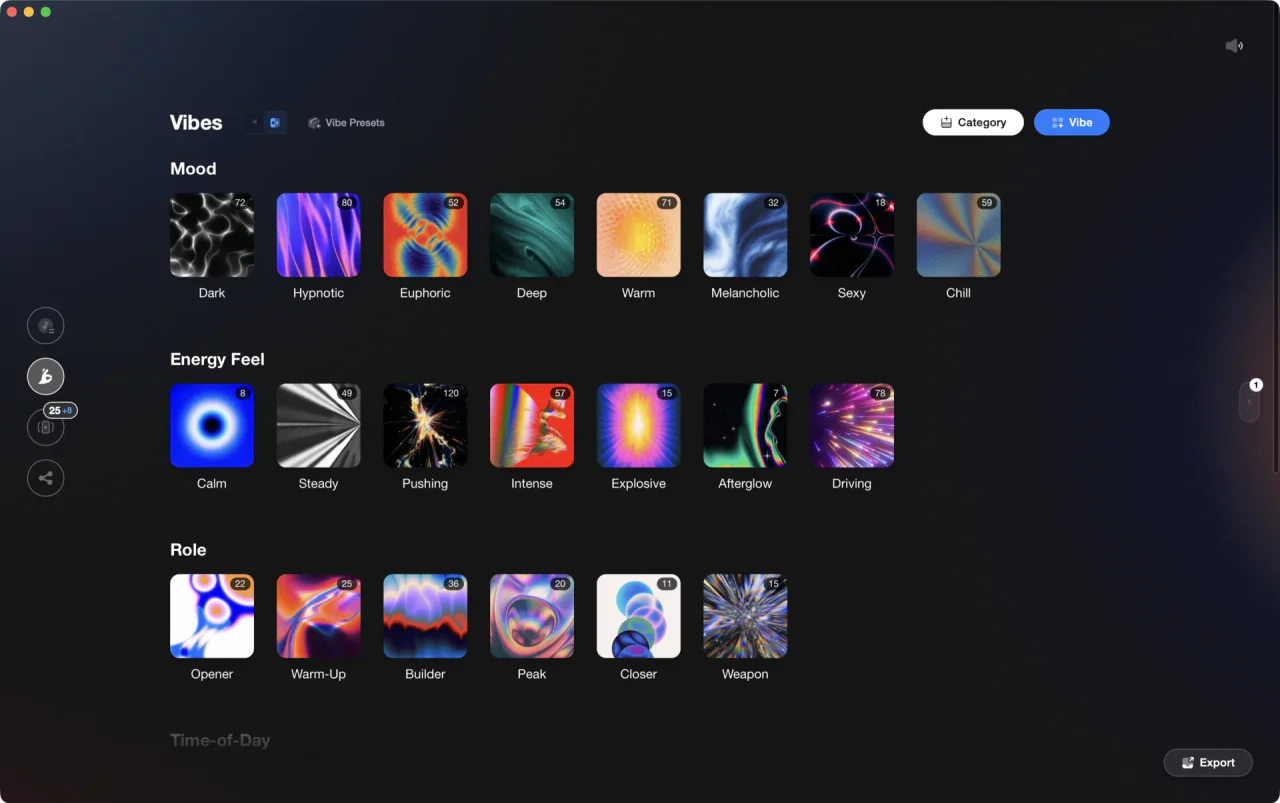
Techniques Covered
Crossfader Use
Beat Matching
DJ Rig Setup
DJ System Configuration
Library Optimization
Track Selection

Precision Blend Technique
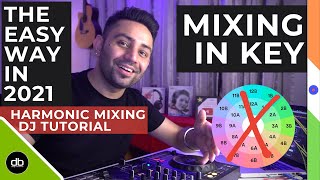
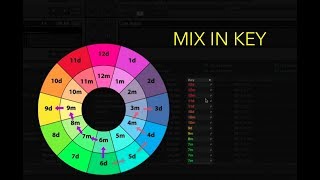
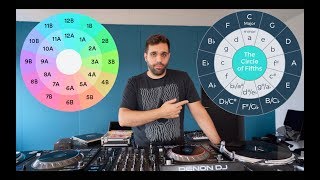
Camelot Key Display Setup in Rekordbox, Serato and Traktor
Auto BPM Transitions Across Genres
Phrase Mixing
Stem Separation
Equipment & Software
Official Manuals
Continue Your Learning Journey
Frequently Asked Questions

Hey, it's Ben Modigell 👋
I DJ and produce as so I so — downtempo, minimal, dub house, tech house, and techno (releases on Spotify and SoundCloud, links above). Everything I write here comes from my own gigs, studio sessions, and library cleanups: the rules I follow, the failure modes I've actually hit, and the workflow I use when nobody's watching. If a technique didn't earn its place in my own sets, it doesn't make it into a tutorial.