Sync Button Technique
A DJ mixing approach that uses sync functions to match tempo and beat position quickly while the DJ focuses on phrasing, EQ, track choice, and transition control.
Sync Button Technique Tutorials

The [Sync](/glossary/sync) Button Technique is the practice of using sync to lock tempo, and sometimes beat position, between tracks so you can focus on phrasing, EQ, energy flow, and timing. For many DJs, the Sync Button Technique is not a shortcut around mixing. It is a way to make mixing more consistent when your beatgrids are correct and your track prep is solid.
If you struggle to get transitions clean while also managing cue points, loops, and phrasing, this technique can help. Used well, the Sync Button Technique frees mental space. Used badly, it hides weak preparation and causes trainwrecks the moment a grid is wrong.
That is why the real skill is not pressing Sync. The real skill is knowing when sync is trustworthy, when to nudge manually, and when to fall back to your ears and learn manual beat matching fundamentals.
The visual way to organize your DJ library. Tag by vibe, export to any DJ app.
What Is Sync Button Technique?
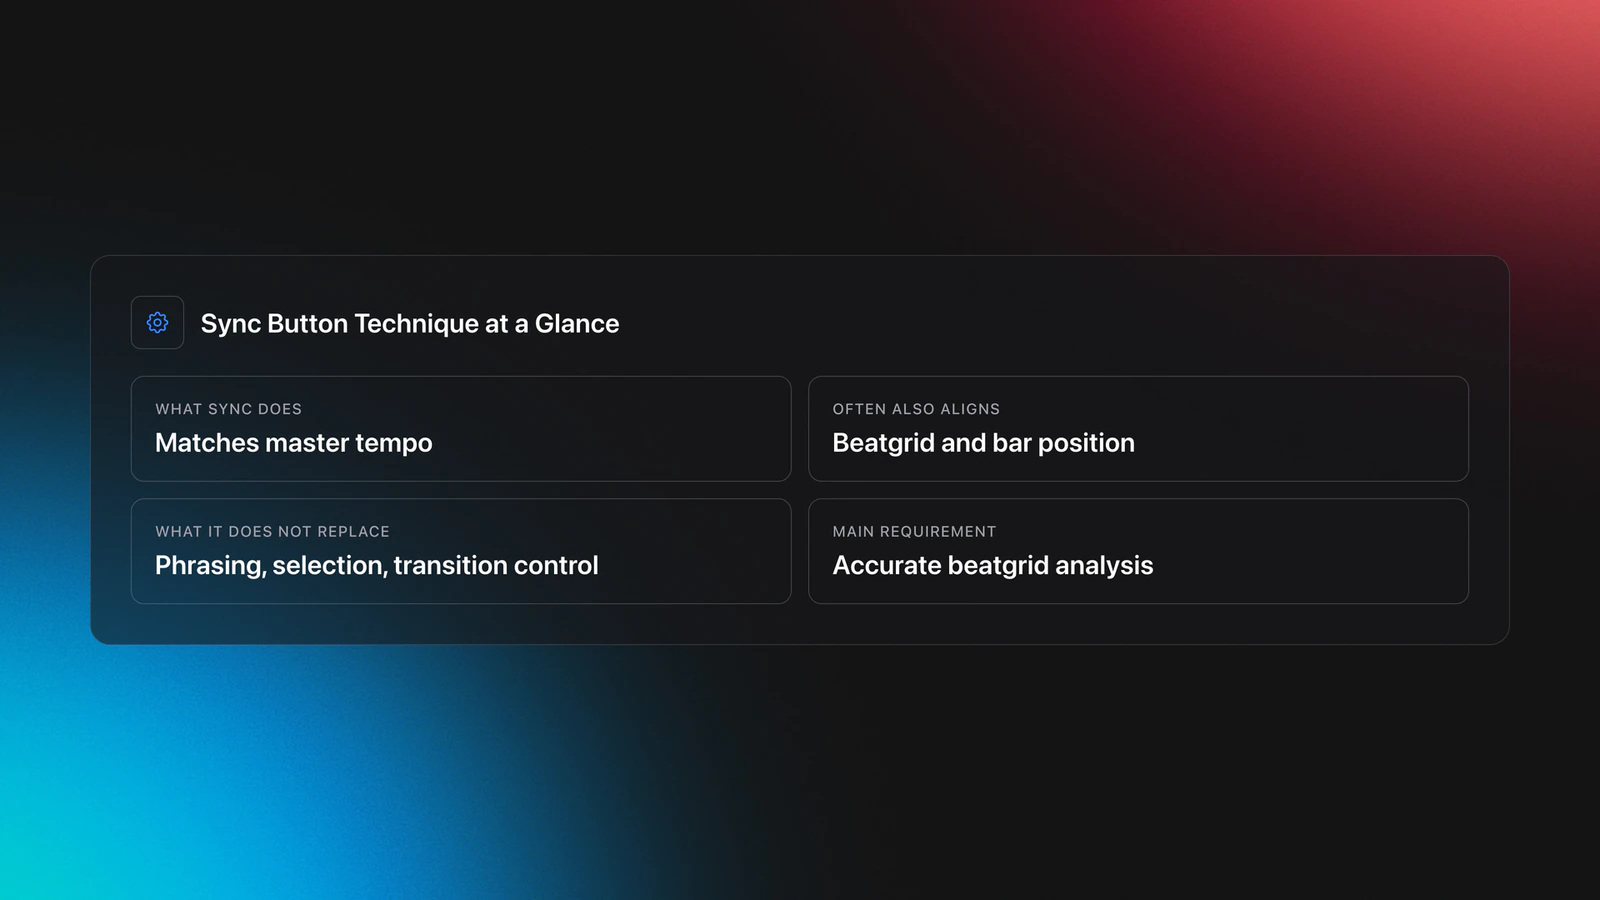
Sync Button Technique is a DJ workflow where you use a deck’s sync function to match the incoming track to the current master tempo, and in many systems, align its beatgrid and bar position too. In practice, it is a tempo and timing aid, not a replacement for phrasing, selection, or transition control.
Different platforms implement sync in slightly different ways. Serato documents both Beat Sync and Simple Sync, while Traktor and rekordbox also rely heavily on accurate beatgrid analysis for tighter results. In all cases, bad analysis leads to bad sync behavior, especially on tracks with drifting tempo or live drums.
This is why preparation matters as much as performance. The Serato Beat Sync documentation, Serato beatgrids guide, and rekordbox manual all make the same core point: sync works best when beatgrid information is correct.
Why Use Sync at All?
You use sync to reduce mechanical workload during a mix. That gives you more attention for phrase placement, EQ balance, looping, crowd reading, and creative layering.
- Locks tempos quickly so transitions start cleaner
- Helps manage three or four decks with less drift
- Makes loop layering and hot cue routines more predictable
- Reduces panic in fast transition chains
- Creates more headroom for phrasing and track choice
Native Instruments frames sync as one part of modern beatmatching workflow rather than a separate craft. Their Native Instruments beatmatching guide shows sync as a valid way to keep tracks at the same speed once tracks are prepared properly.
Equipment and Setup
The gear question is simple. You need a sync-capable controller, media player, or DJ app, and you need tracks with accurate BPM analysis. The setup question is harder because the reliability of sync depends on how the software defines the master deck, beatgrid, and bar alignment.
For quantized electronic music, sync is often very stable. For disco edits, funk, classic hip-hop, vinyl rips, and tracks with tempo drift, it may only get you close. Serato’s Simple Sync guide even explains a mode that matches nearby transients when grids are not available, which is useful but not magic.
Treat beatgrids as part of your instrument. The Native Instruments beatgridding tutorial explains how small grid errors can pull the metronome away from the groove. That same problem shows up when you rely on sync in a live set.
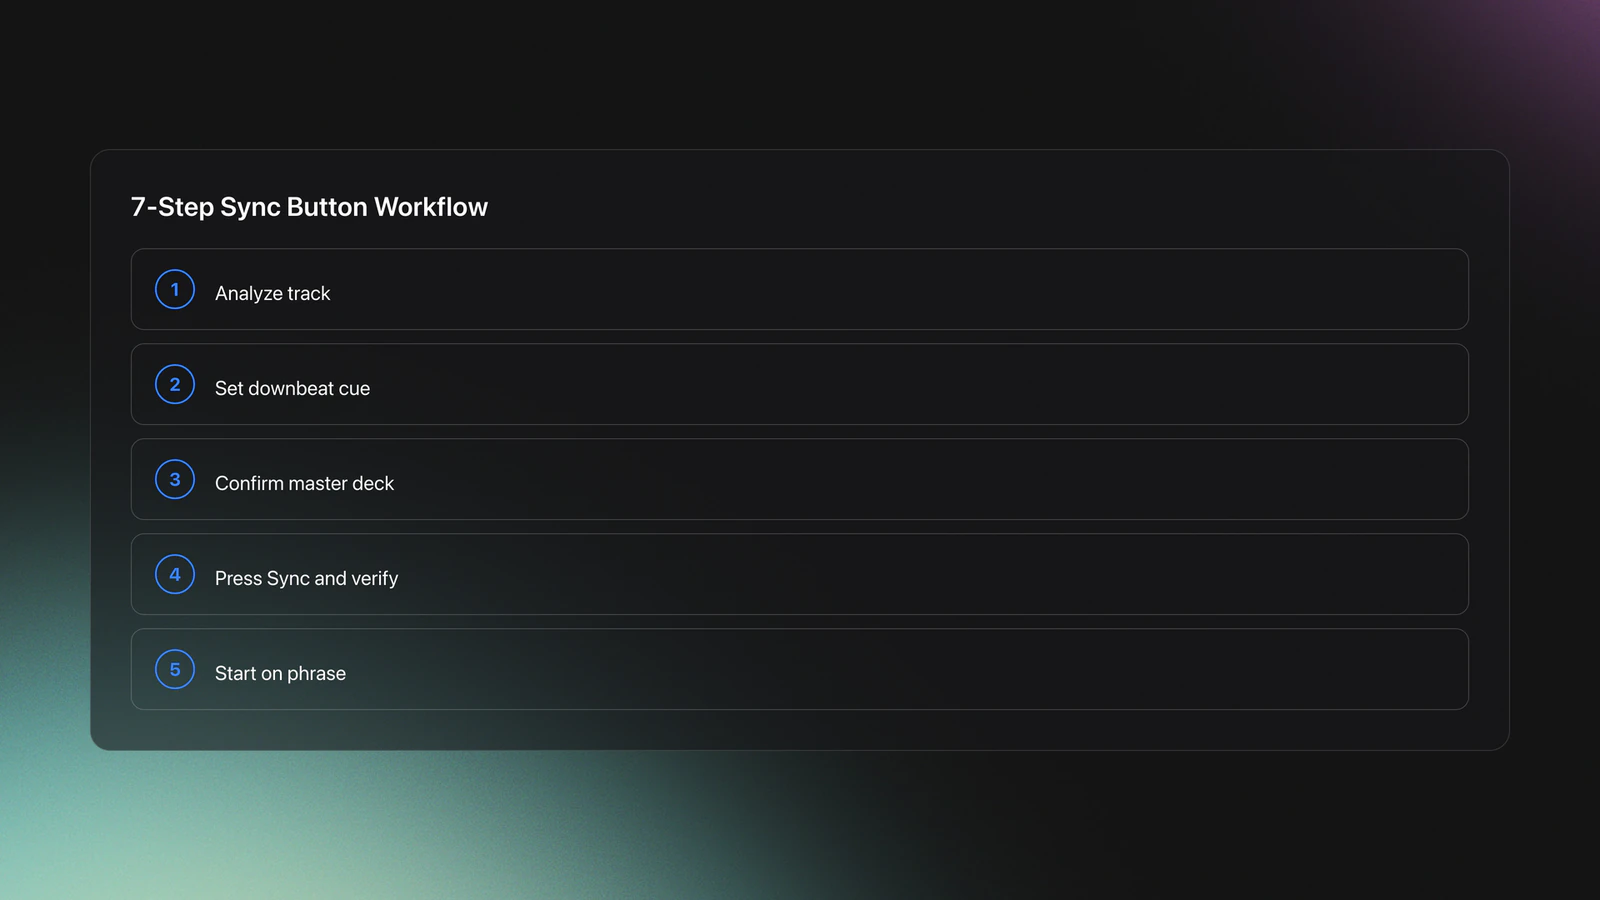
How to Use Sync Button Technique
To use the Sync Button Technique well, start with a prepared track, set the right cue, engage sync, and still listen critically. The button handles alignment. You handle whether the transition actually sounds musical.
| Step | Action | Key Point |
|---|---|---|
| 1 | Analyze the incoming track | Check BPM and beatgrid before the set |
| 2 | Set a clean cue on the downbeat | Bad cue placement weakens even perfect sync |
| 3 | Identify the master deck | Know which deck sets the tempo |
| 4 | Press Sync on the new deck | Confirm tempo and bar position lock correctly |
| 5 | Start on phrase | Use 8, 16, or 32-bar structure |
| 6 | Nudge if needed | Sync does not remove the need to listen |
| 7 | Blend with EQ and faders | A matched tempo still needs a musical transition |
Start with simple pairings. Pick two stable house or techno tracks with clear intros and outros. Let sync handle tempo, then focus on bringing the new track in at the right 16- or 32-bar point. This is where practice phrase matching for cleaner drops becomes more important than the button itself.
Watch for what the software is actually syncing. Serato distinguishes between tempo sync and beat sync behavior depending on mode and deck state. Some systems lock bar position until you touch the platter. Others keep tempo matched but allow intentional offset.
In practice, that means you should glance at the waveform, listen in headphones, and check whether kicks are landing together. If they are not, nudge first. Do not assume the screen is right.
Once that feels easy, use the Sync Button Technique in faster transition chains. Cue the next track, sync it, check the phrase, and swap energy quickly without spending the whole blend riding the pitch fader.
What Sync Does Not Do
Sync does not choose the right track. It does not fix clashing arrangements, muddy low end, or bad phrase timing. It also does not guarantee tight alignment when the source material is badly analyzed or naturally drifts.
This matters because many beginners assume sync equals seamless. It does not. A synced track can still enter one bar late, fight the outgoing vocal, or stack kicks in a way that collapses the groove.
The result is simple. Sync solves one layer of the problem. You still need timing, restraint, and track knowledge. If you also use harmonic mixing to improve track fit, your blends will usually sound more intentional.
Common Mistakes
Most sync failures come from preparation errors, not performance errors. The first fix is usually in the library, not on the mixer.
| Mistake | Why It Happens | Fix |
|---|---|---|
| Trusting bad beatgrids | Software guessed the downbeat or tempo wrong | Check and edit grids before performance |
| Ignoring phrase alignment | Tempo matches, but sections do not | Count bars and enter on a musical phrase |
| Using sync on drifting tracks blindly | Live drumming or old edits move off-grid | Use sync to get close, then correct by ear |
| Not knowing the master deck | Tempo jumps unexpectedly | Learn your platform’s master and sync logic |
| Relying on visuals only | Waveforms look close but sound off | Preview in headphones and nudge if needed |
A second mistake is skipping ear training because sync seems easier. That works until you play unfamiliar gear, jump into a back-to-back set, or load a track with a broken grid. Then the safety net disappears.
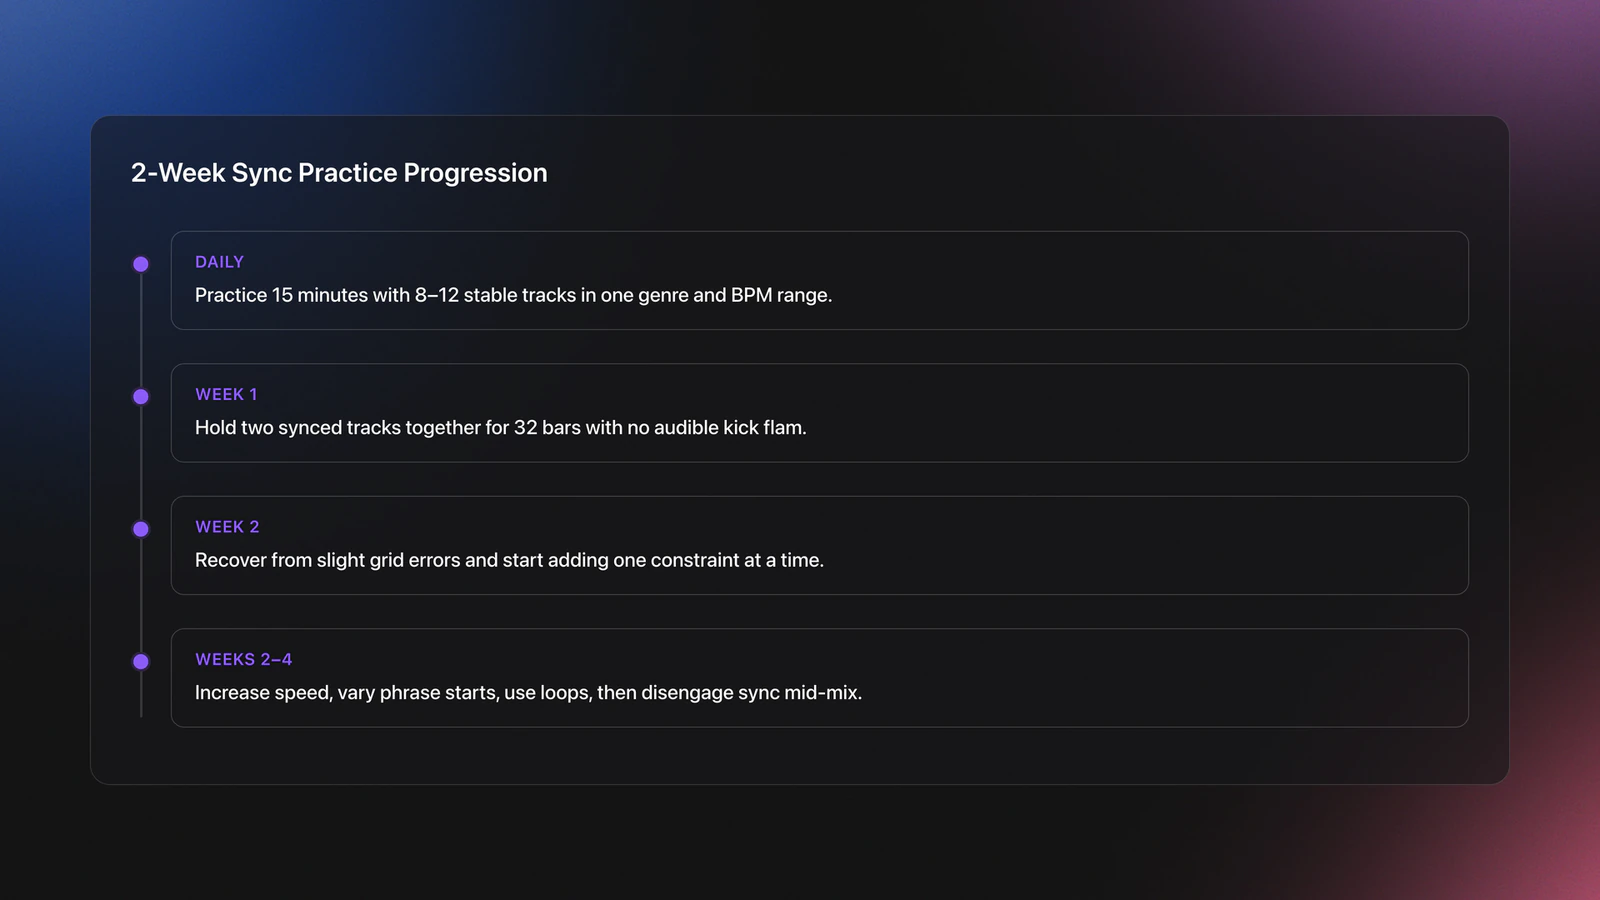
Practice Routine
A good sync practice plan is short and repeatable. Through daily 15-minute practice sessions over several years, I found that focused transition drills build more reliable timing than marathon sessions. The biggest gains usually show up over 2–4 week cycles, not in one long weekend.
Start with one genre and one BPM range. Use 8 to 12 tracks with stable drum programming. Build a small practice crate sorted by easy, medium, and tricky transitions.
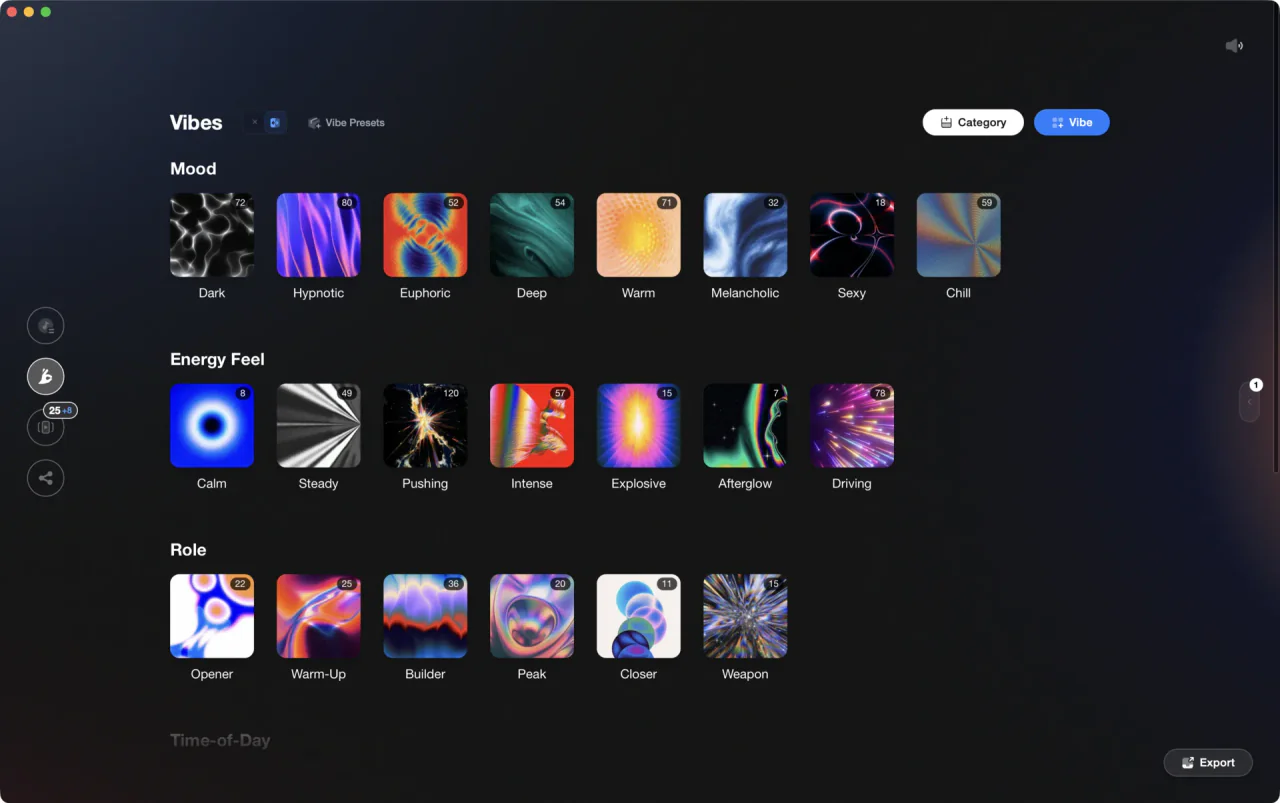
This is one of the few places where Vibes fits naturally. A structured practice library lets you group tracks by BPM stability, phrase length, vocal density, or transition difficulty so each short session targets one weakness instead of everything at once.
Your first benchmark is simple. Hold two synced tracks together for 32 bars without audible flam on the kicks. Your second benchmark is harder. Recover smoothly when one grid is slightly wrong.
By week two, add one constraint at a time. Mix faster. Start from different phrase points. Use loops. Then disengage sync after the mix starts and keep control with your ears.
Troubleshooting Sync Problems
If sync sounds wrong, check the beatgrid first, the cue point second, and the phrase third. Those three issues explain most failures.
If the BPM matches but the beats are offset, your deck may be in a tempo-only mode or your start point may be late. If the first few beats align and then drift, the track may have a weak grid, tempo fluctuation, or a live drummer. In that case, use sync to get close, then correct manually and stay ready to learn manual beat matching fundamentals.
If the drop lands awkwardly even though the beats match, the issue is phrasing. Count bars. Mark downbeats. Plan where the outgoing track is in its structure before you touch the new deck.
When This Technique Works Best
The Sync Button Technique works best with quantized electronic music, tight beatgrids, and DJs who want more attention for layering, effects, looping, or fast set construction. It is especially useful in house and techno where long blends and stable tempos reward precision.
It is also helpful in three-deck and four-deck mixing. Native Instruments has noted how automatic beatmatching helped DJs create denser, more layered sets once tempo maintenance stopped taking all their attention.
Where it works less well is loose funk, disco, vinyl-only setups, and older recordings with fluctuating timing. You can still use sync there, but more as a starting point than a final answer.
Should You Learn Manual Skills Too?
Yes. The short answer is yes. Even if sync is your default, manual skills make you more resilient.
Manual beatmatching teaches speed judgment, micro-correction, and calm under pressure. Those skills make sync safer because you can hear when it is wrong and fix it quickly. The best modern approach is not sync versus manual. It is knowing both.
Key Takeaways
The Sync Button Technique is worth learning because it can make your transitions cleaner and your workflow faster, but only when your prep is solid. The technique is really a combination of beatgrid accuracy, phrase awareness, and the judgment to trust or override the software.
- Sync is most reliable when beatgrids, cue points, and master deck logic are correct
- Phrase timing still decides whether a transition sounds musical
- The best next step is to pair sync drills with manual recovery practice
Start with stable electronic tracks, practice short daily sessions, and test recovery when sync is imperfect. From there, build toward phrase-led transitions, then multi-deck control.
The visual way to organize your DJ library
Tag tracks by vibe. See everything at once. Export to any DJ software.
A visual system for organizing your DJ library.
More Tutorials

Frequently Asked Questions

Hey, it's Ben Modigell 👋
I DJ and produce as so I so — downtempo, minimal, dub house, tech house, and techno (releases on Spotify and SoundCloud, links above). Everything I write here comes from my own gigs, studio sessions, and library cleanups: the rules I follow, the failure modes I've actually hit, and the workflow I use when nobody's watching. If a technique didn't earn its place in my own sets, it doesn't make it into a tutorial.